Oreo Balls are a super simple treat for when you need a last-minute sweet (or for anytime!). Just 5 ingredients and less than 30 minutes to make! This classic version tastes a bit like bite-sized Oreo cheesecakes. Try yours out with different varieties of Oreos for fun!

I originally shared this recipe for Oreo Truffles over on Spend with Pennies!
Back to work! After 6 weeks of “maternity leave” I’m finally back in the kitchen.
Slooowly easing into things; today’s Oreo Balls recipe is actually originally from a few years ago and I filmed the video for it (below the recipe) while I was still pregnant, so a lot of this recipe was actually done in advance. Thank goodness, because even though Luke’s really been a pretty decent sleeper so far, I’m tired. Please excuse any typos in advance.
These Oreo balls were one of my favorite easy no-bake desserts while I was pregnant and too big and uncomfortable to turn on the oven (or too lazy to make real chocolate truffles). They were also a favorite for bringing to parties over the holidays when I needed something super quick and easy to make with a newborn.
Dipping
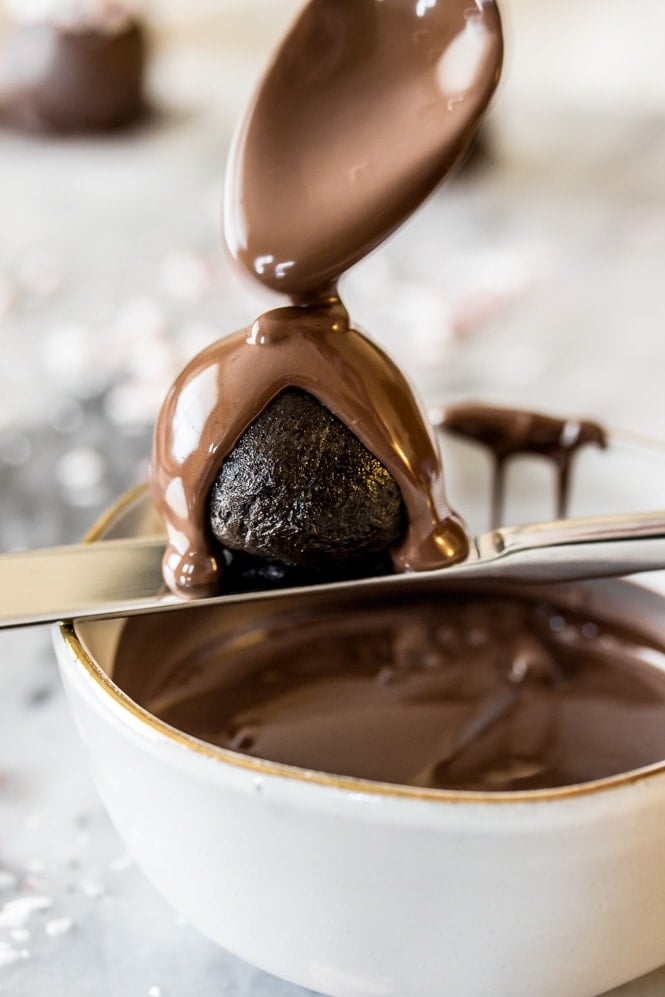
The most difficult part (if you can call it difficult) of making these candies is their chocolate coating. If you have a set of candy dipping tools you can absolutely use them for your dipping the Oreo balls. I have a set and love mine, they’re inexpensive and come in handy often. However, if you don’t have them, here’s a simple way to dip the Oreo balls and have them turn out smooth and pretty (I’ve found just dunking them right in the chocolate usually makes a mess).
Drizzle a small bit of melted chocolate on the “blade” of a butter knife and then place one Oreo ball on top of the chocolate (this makes sure the bottom of the Oreo ball gets covered in chocolate, otherwise it would be exposed). Balance the knife with the truffle on it over your bowl of chocolate and then use a spoon to entirely cloak the ball with more melted chocolate (illustrated above!). Now use another knife to carefully slide the Oreo ball onto a wax paper lined baking sheet.
If desired, drizzle with white chocolate, sprinkle with Oreo crumbs or sprinkles, and allow the chocolate to harden before enjoying.

Tips for No-Fail Oreo Balls:
- I’ve tried a lot of different varieties of melting wafers and my preferred brand is Ghirardelli. I have no affiliation with them, I just think they have the best taste and do the best job of smoothly, evenly coating the truffles.
- Instead of melting wafers, you can use chocolate chips. I recommend thinning the chocolate with a teaspoon of shortening (melt it with the chocolate, and stir well) if substituting chips. Keep in mind the chocolate will take longer to set this way.
- These truffles need to be frozen briefly (15 minutes) before dipping. I’ve found that if you freeze them much longer than that the chocolate tends to crack and break away from the Oreo ball interior as it sets (a problem I’ve also noticed with my cake pops!).
- Have fun! There are so many different flavors of Oreos cookies out there now (Ieven have a homemade Oreo cookie recipe, but haven’t tried that with this recipe yet)! Go ahead and try substituting your favorite variety for traditional Oreos. I have a Peppermint Oreo Truffle recipe that reminds me of a Thin Mint Cookie… so good!

Make-Ahead and Storing
Oreo balls can be made up to several days in advance. Store them in the refrigerator, preferably in an airtight container. They can be frozen (in an airtight container) for several months.
Enjoy!
More Recipes You Might Like:

Oreo Balls
Prevent your screen from going dark
Servings: 32 oreo balls
Calories: 119kcal
Instructions
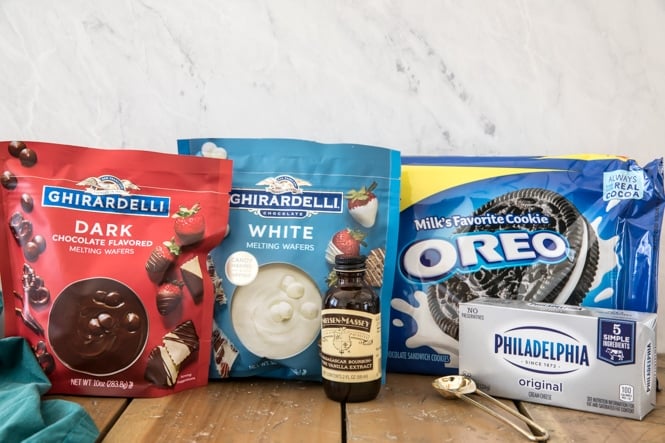
Place Oreo cookies in a food processor. Pulse until they have been pulverized into fine crumbs. Set aside.
36 Oreo cookies
In a stand mixer (or in a large bowl using an electric mixer), beat cream cheese until it is smooth.
8 oz (226 g) cream cheese
Reserve 2 Tablespoons of your cookie crumbs and add the remaining crumbs in with the cream cheese. Add vanilla extract and stir all ingredients until well-combined.
½ teaspoon vanilla extract
Scoop Oreo mixture by 1 ½ Tablespoon and drop onto wax paper-lined cookie sheet.
Place in freezer and chill for 15 minutes.
Place your dark chocolate melting wafers in one small bowl and your white chocolate in another. Prepare according to instructions on packaging, heating until melted.
1 cup (170 g) dark chocolate melting wafers, 1 cup (179 g) white chocolate melting wafers
Retrieve your Oreo balls from the freezer and dip truffles in chocolate, dipping half of the truffles in dark chocolate and half in the white chocolate¹. Immediately after dipping each truffle, sprinkle with reserved cookie crumbs.
Allow chocolate to harden before serving truffles. Keep stored in an airtight container in the refrigerator.
Notes
Storage
Store in the refrigerator, preferably in an airtight container. They will keep for several days in the refrigerator. They may also be frozen in an airtight container for several months.Nutrition
Serving: 1oreo ball | Calories: 119kcal | Carbohydrates: 14g | Protein: 1g | Fat: 7g | Saturated Fat: 4g | Cholesterol: 8mg | Sodium: 91mg | Potassium: 39mg | Fiber: 1g | Sugar: 10g | Vitamin A: 95IU | Calcium: 10mg | Iron: 1mg
Nutritional information is based on third-party calculations and should be considered an estimate only. Actual nutritional content will vary based upon brands used, measuring methods, cooking method, portion sizes, and more.
This recipe was originally published 01/15/2018. Updated to include new photos, updated tips, and a video on 01/08/2020.
Source link

