


My cake pops are made completely from-scratch–no box mixes or canned icings here! These are surprisingly easy to make and perfect for parties. Recipe includes a how-to video!
Cake Pops From Scratch
Nearly everyone has made or enjoyed cake pops using a boxed cake mix and icing, but have you ever made them from-scratch? Years ago (before I had the blog), when I first wanted to try out this sweeping internet sensation I was a little frustrated that all of the versions that I could find required store-bought cake mix and icing. It was many years before I finally decided to experiment with a from-scratch version of this popular recipe, and let me just say that it’s been a total game. changer. !
Unlike the semi-homemade version, these 100% homemade cake pops are sweet without being too sweet. They taste like real cake (not chemicals!), and you can easily eat two, three, or four at a time…not that I’ve done that or anything.
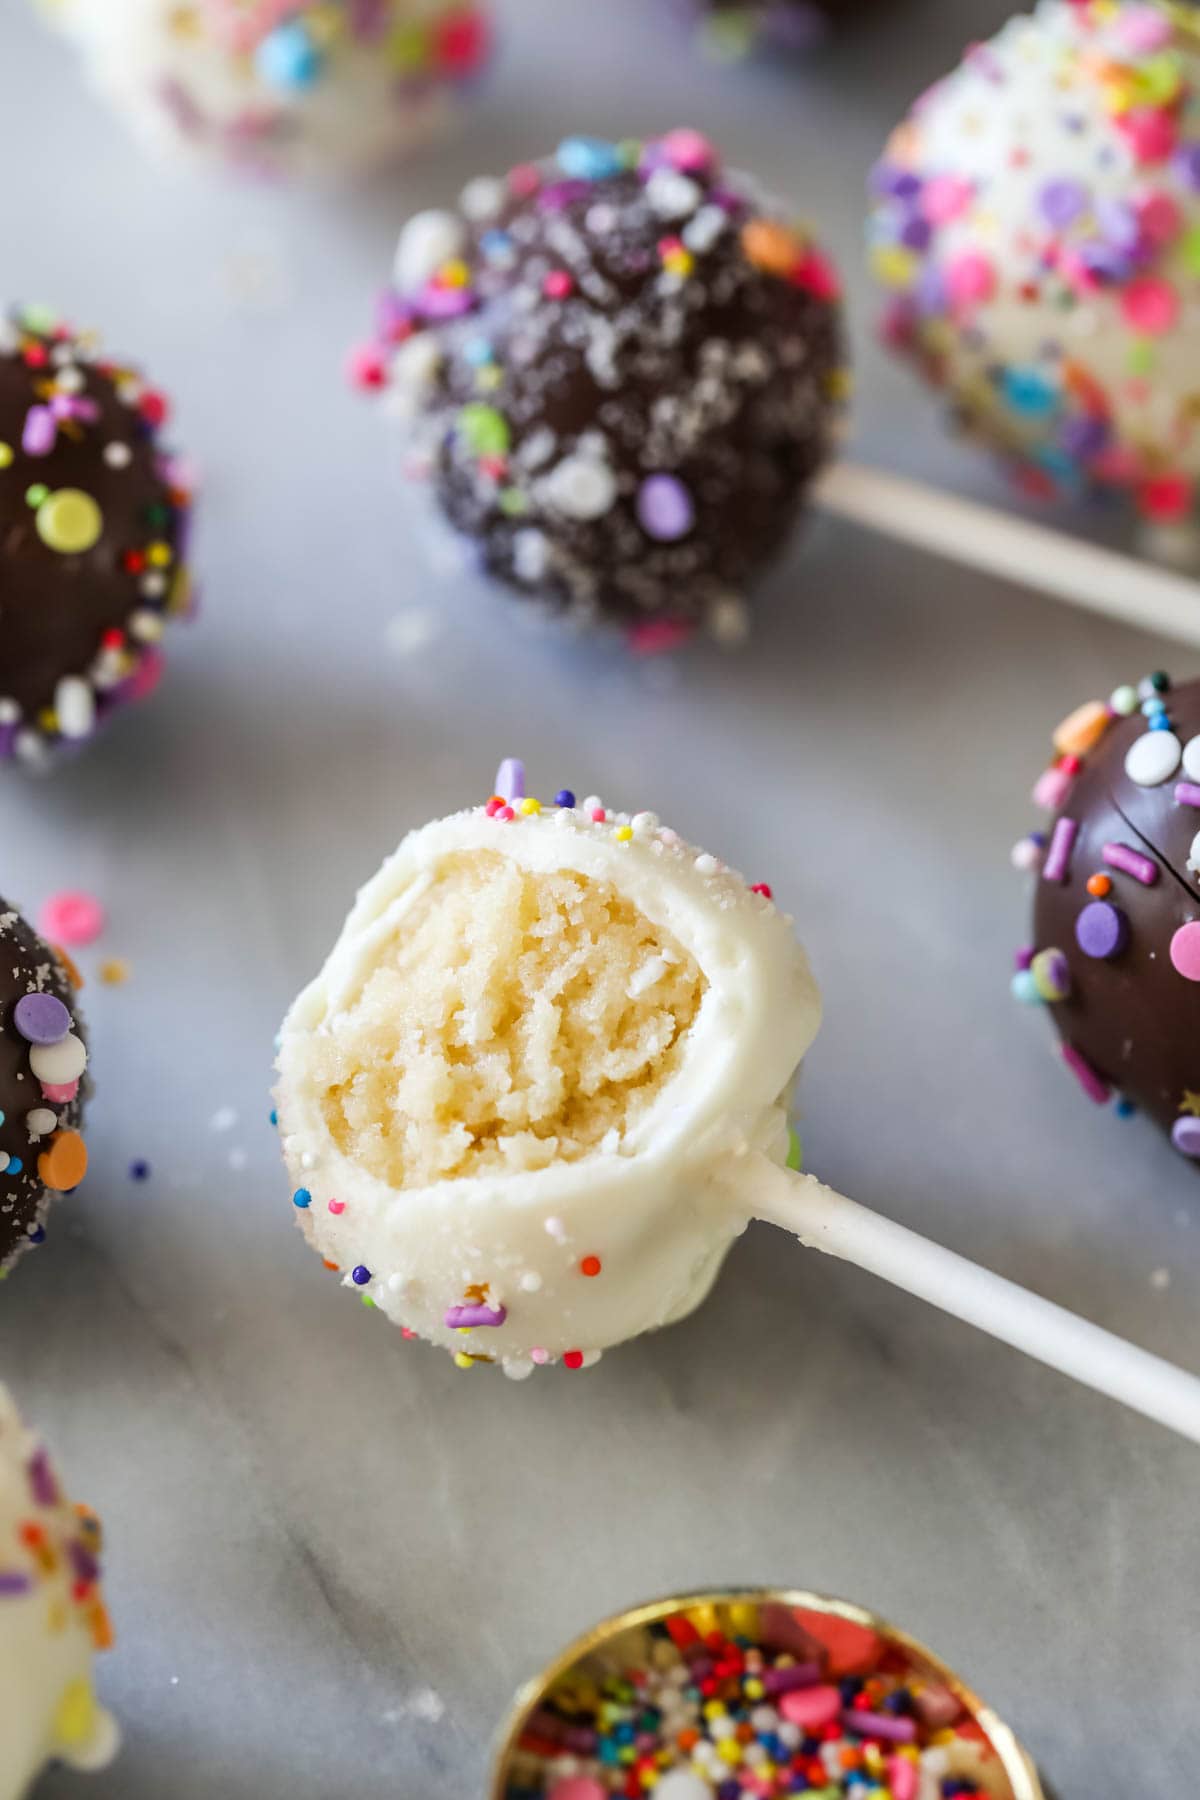
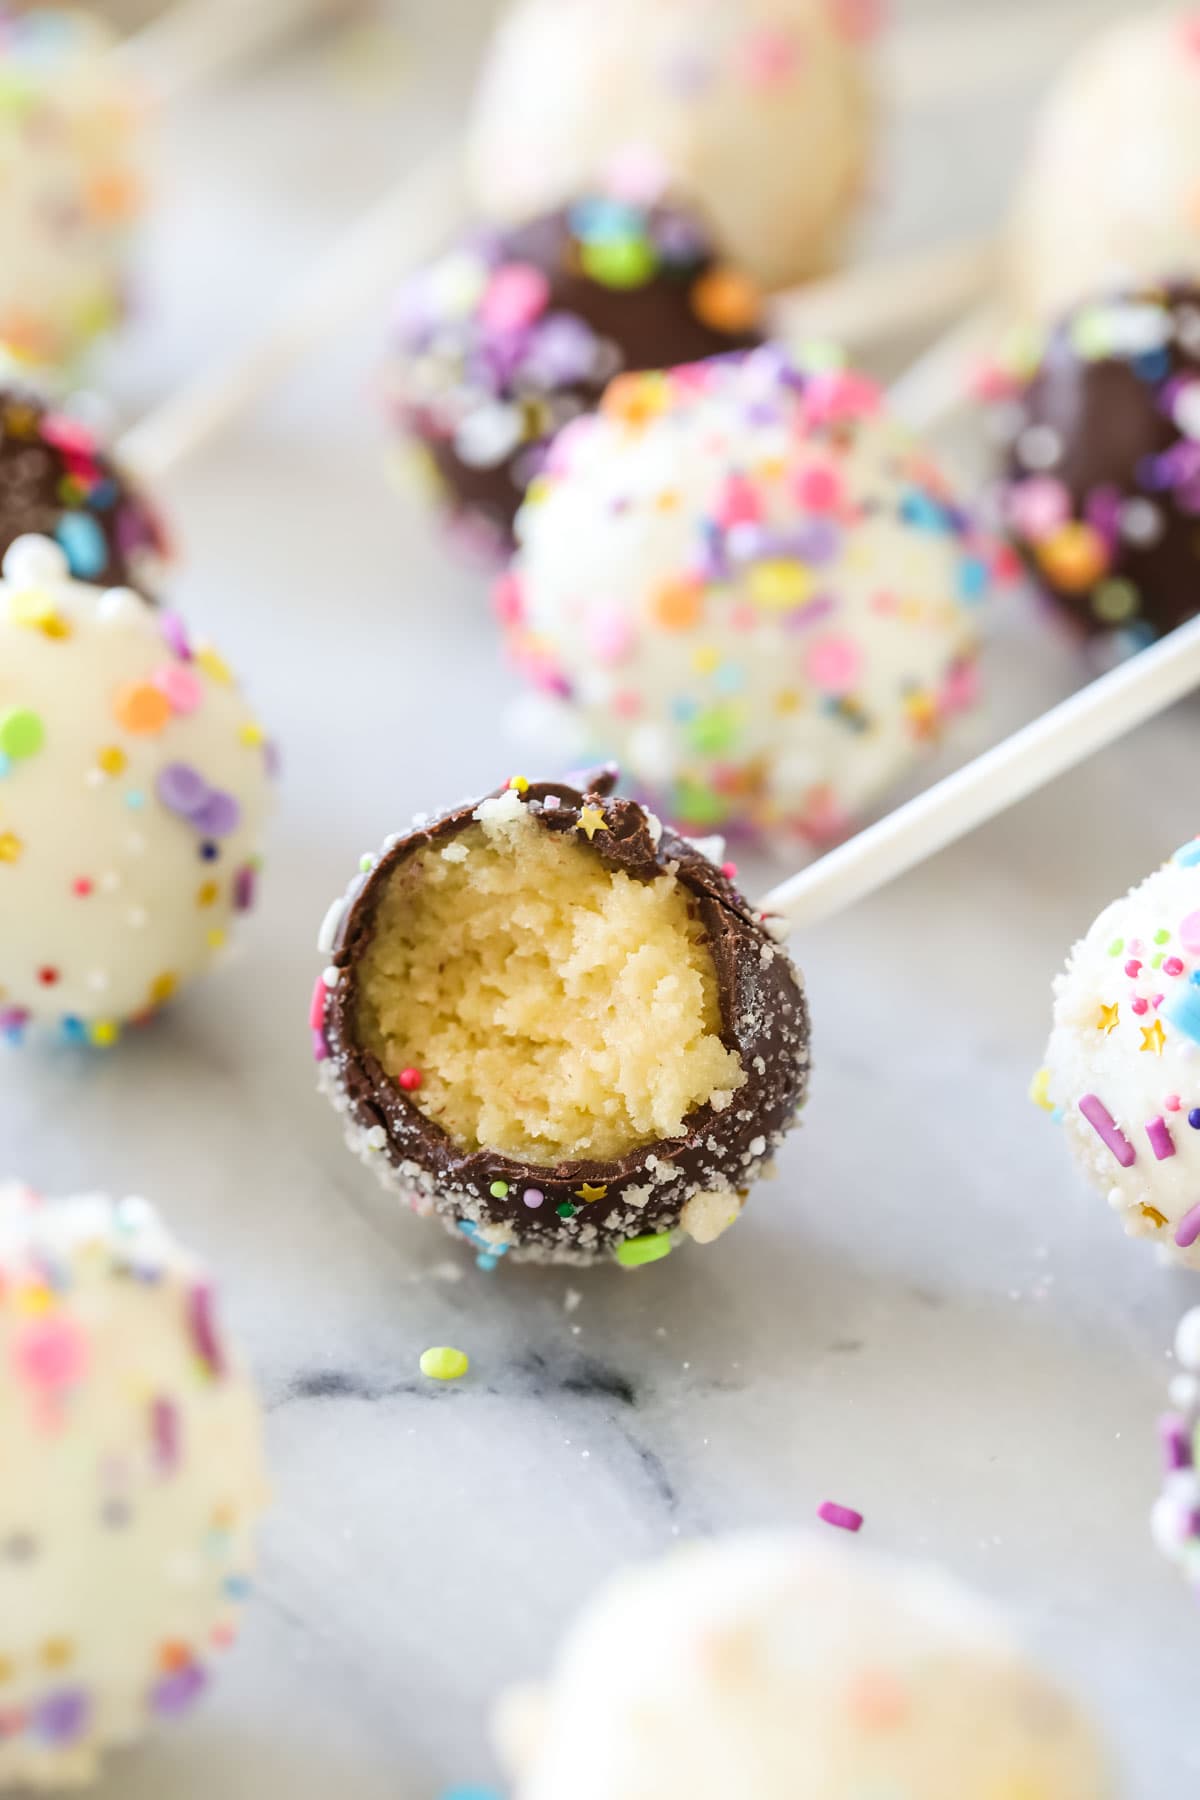
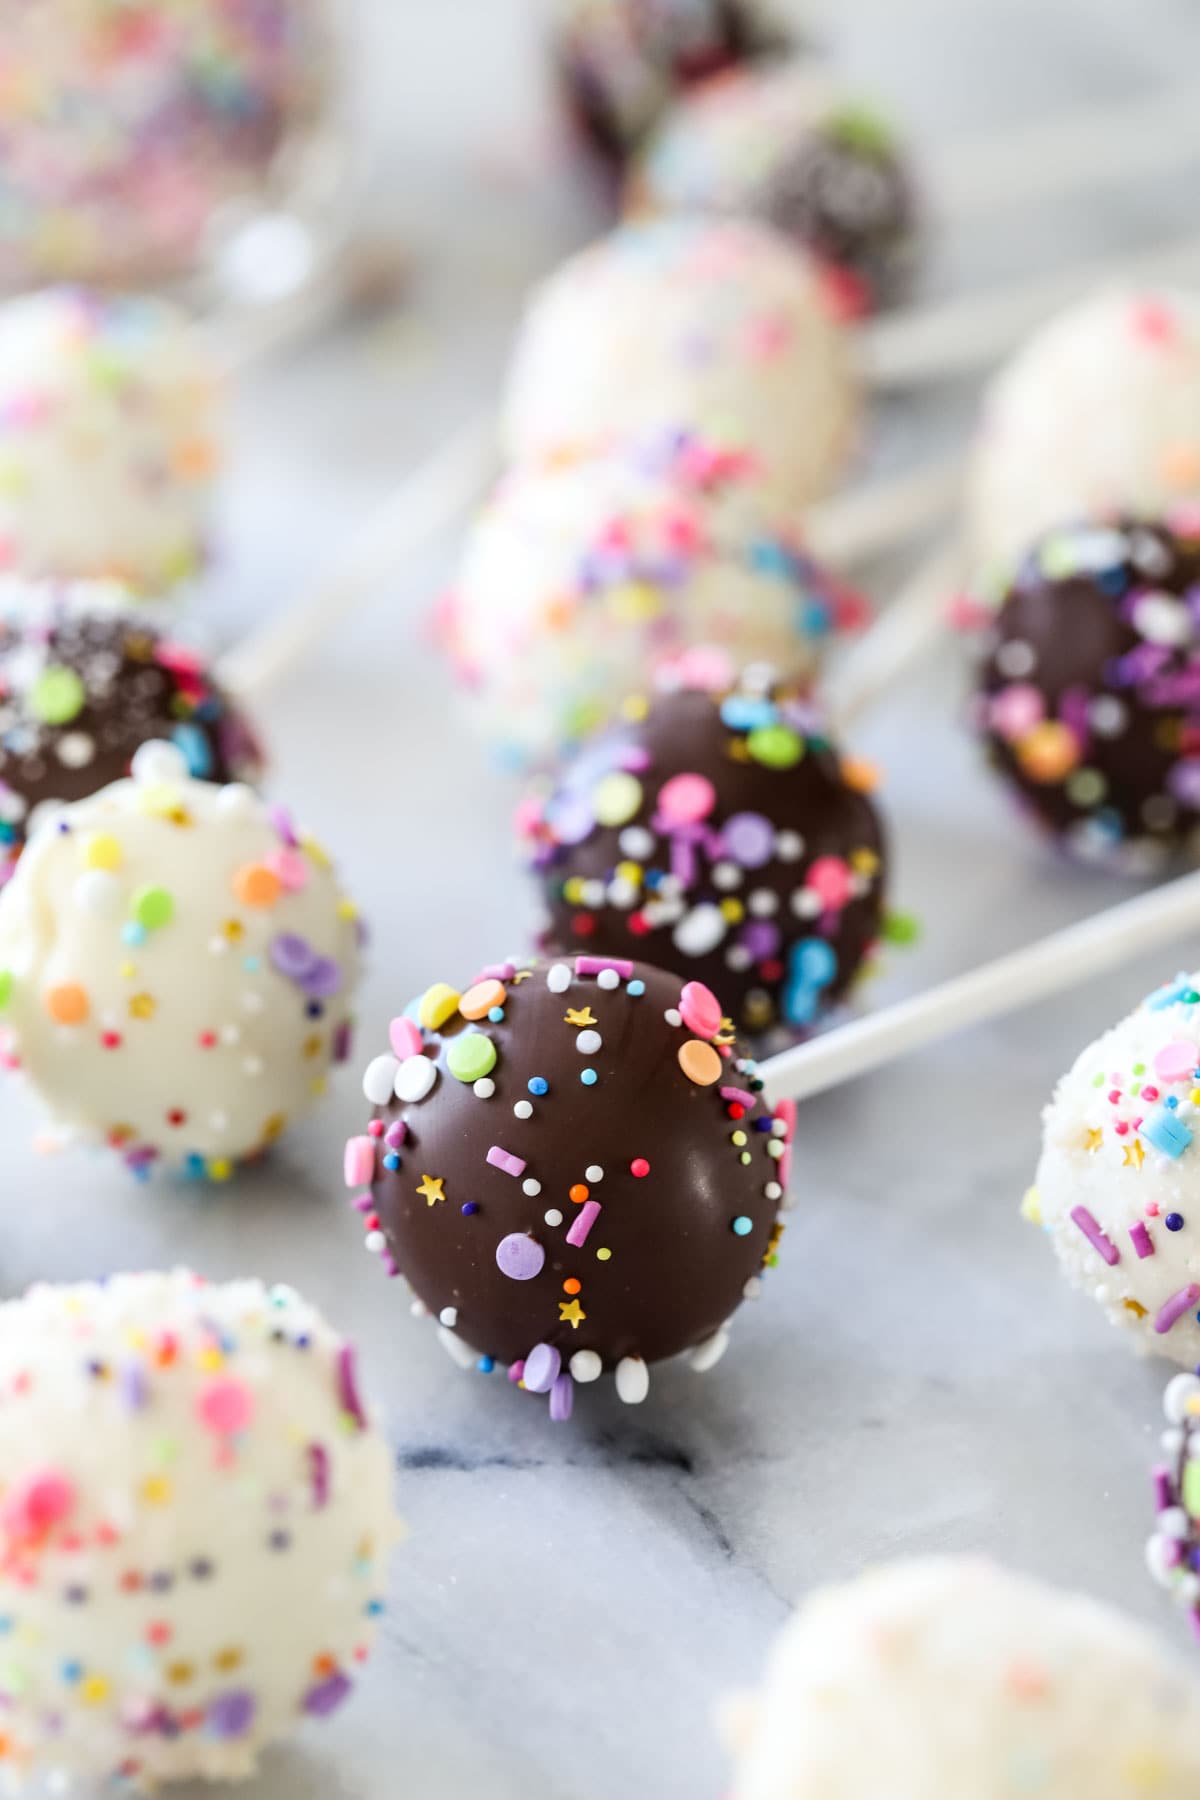
My recipe uses one layer of classic yellow cake and just a few tablespoons of buttercream rolled up into fudgy balls. The texture is like a very, very moist cake, similar to a truffle or Oreo ball, and it contrasts so nicely against the smooth, snappy chocolate exterior.
Angie Dudley of Bakerella shared the original cake pops recipe back in 2008 and they took the internet (and Pinterest) by storm. Since then, they’ve only continued to grow in popularity, and for good reason! They’re cute, fun and even though the instructions are a bit lengthy, they’re honestly very easy to make. Plus they’re so much fun to make with kids!
Why try my recipe:
- 100% from-scratch!
- Doubles easily to make a lot of pops (great for parties!).
- Simple–make the cake, crumble it up, add the icing, roll, and dip!
- Can be made in advance or frozen.
- Includes a detailed video + in-process photos so you know exactly how yours should look.
What You Need
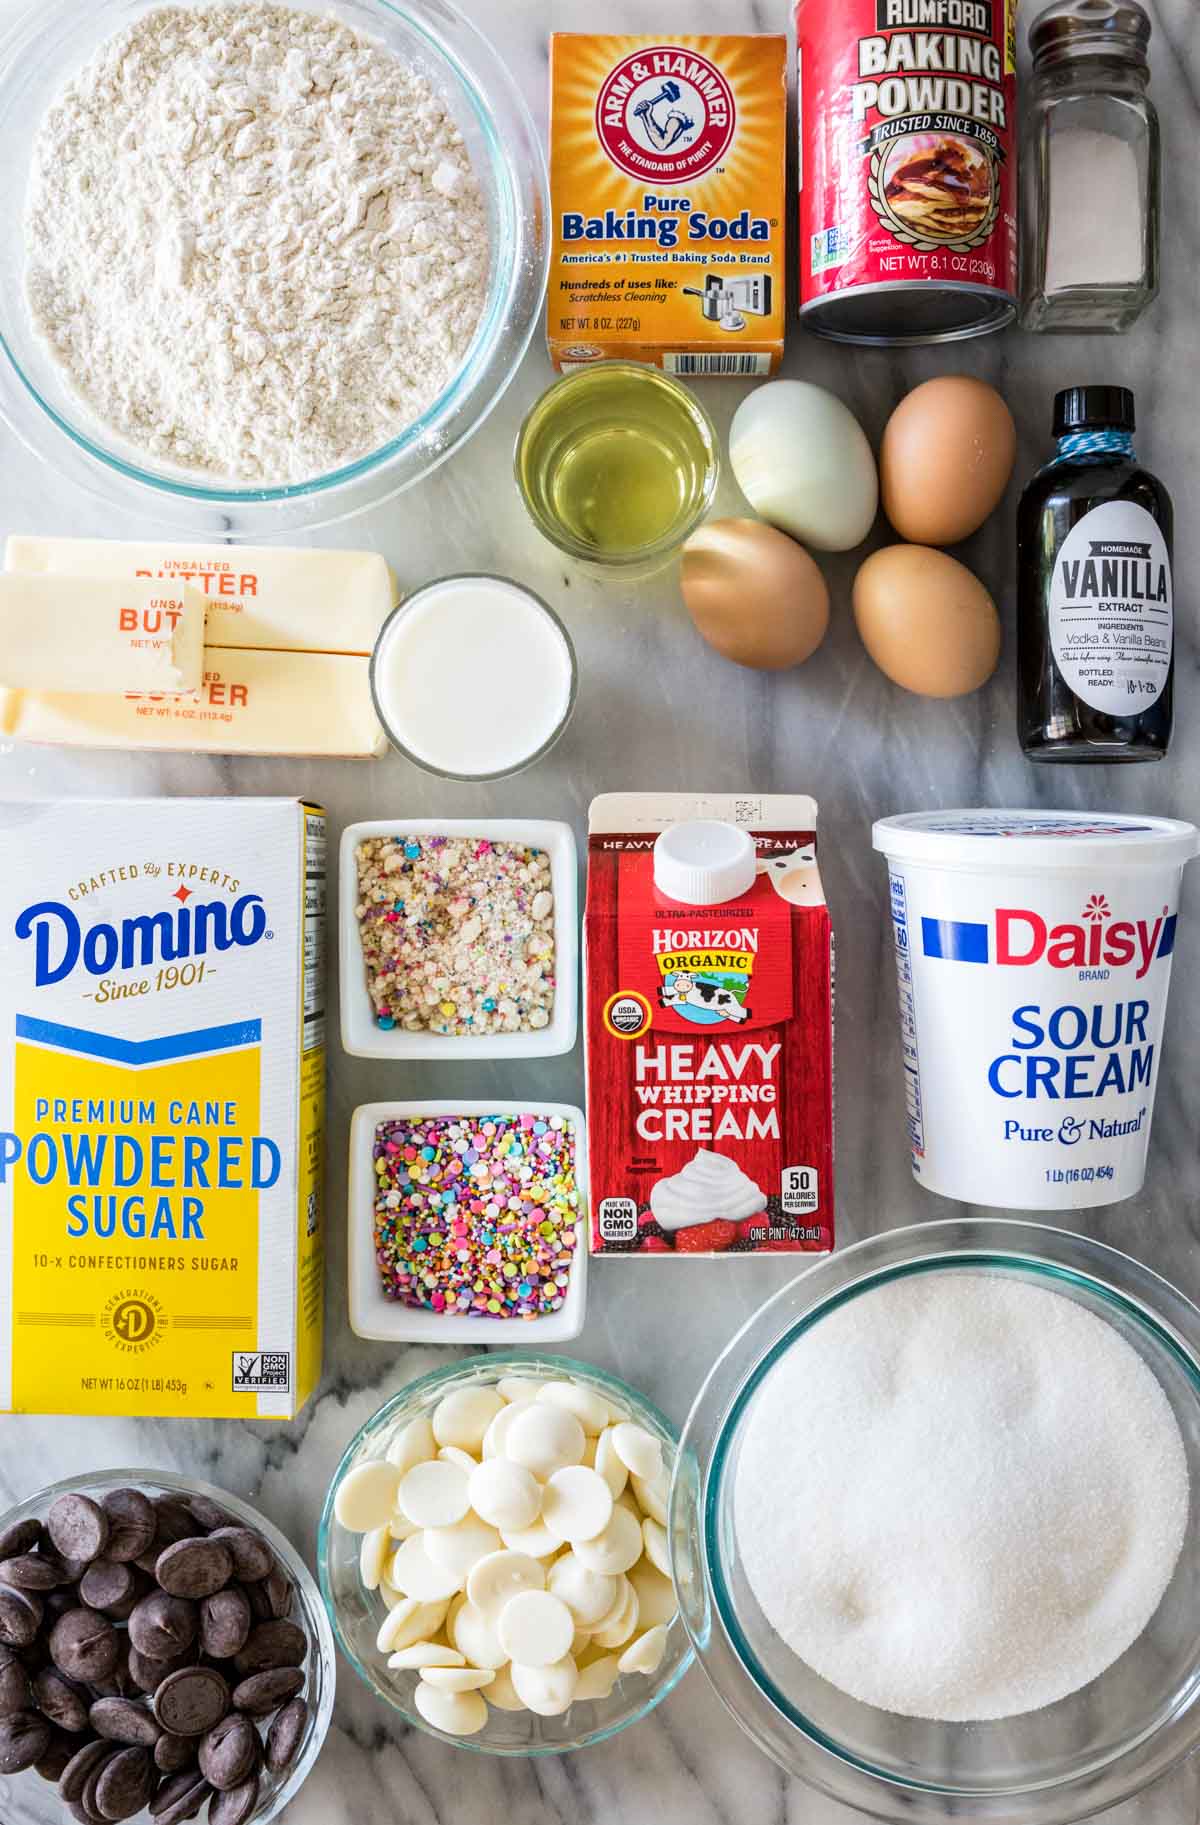
I know there are quite a few ingredients up there, so I’ll just point out the important ones:
- Butter. We’ll be using a combination of melted butter and oil in the cake (this adds flavor and moisture) along with softened butter in the frosting. I recommend using unsalted butter for both.
- Cake flour. I find that cake flour works best here, but if you don’t have any on hand, all-purpose flour will work too. You will need less flour if you use all-purpose; instructions for substituting are in the recipe notes below.
- Sour cream. If you’ve been following along, you already know that I’ve been sneaking sour cream into my cakes and cupcakes lately for the best possible flavor and texture. It makes for such a tender crumb and works equally well in these cake pops.
- Melting wafers/almond bark. You can use white chocolate or dark chocolate; I like to use both! Note that you’ll have a bit of leftover chocolate when you’re done; this is necessary so you can dip the pops smoothly (and not ruin them by scraping against the bottom of the glass/bowl). You could also skip the wafers or bark and instead use tempered chocolate or follow my instructions on how to melt chocolate chips in the microwave — just note that you may need to thin the chocolate with a bit of coconut oil or shortening and, if not tempered, you may end up with some white streaks in your chocolate.
- Sprinkles. These are optional, but they look so pretty! You could also decorate your pops with a chocolate drizzle or cake crumbs (more on this below!).
SAM’S TIP: I love to dip my cake pops in chocolate and then immediately roll them through my crushed cake batter crumbs. Doing this adds SUCH a nice texture and added flavor, and it makes them pretty too! The first pop in this post is rolled in those crumbles, if you’re looking for a visual.
Remember, this is just an overview of the ingredients I used and why. For the full recipe please scroll down to the bottom of the post!
How to Make Cake Pops
There are quite a few steps, but nothing overly complicated or difficult. Let’s break it down step by step.
Make the Cake
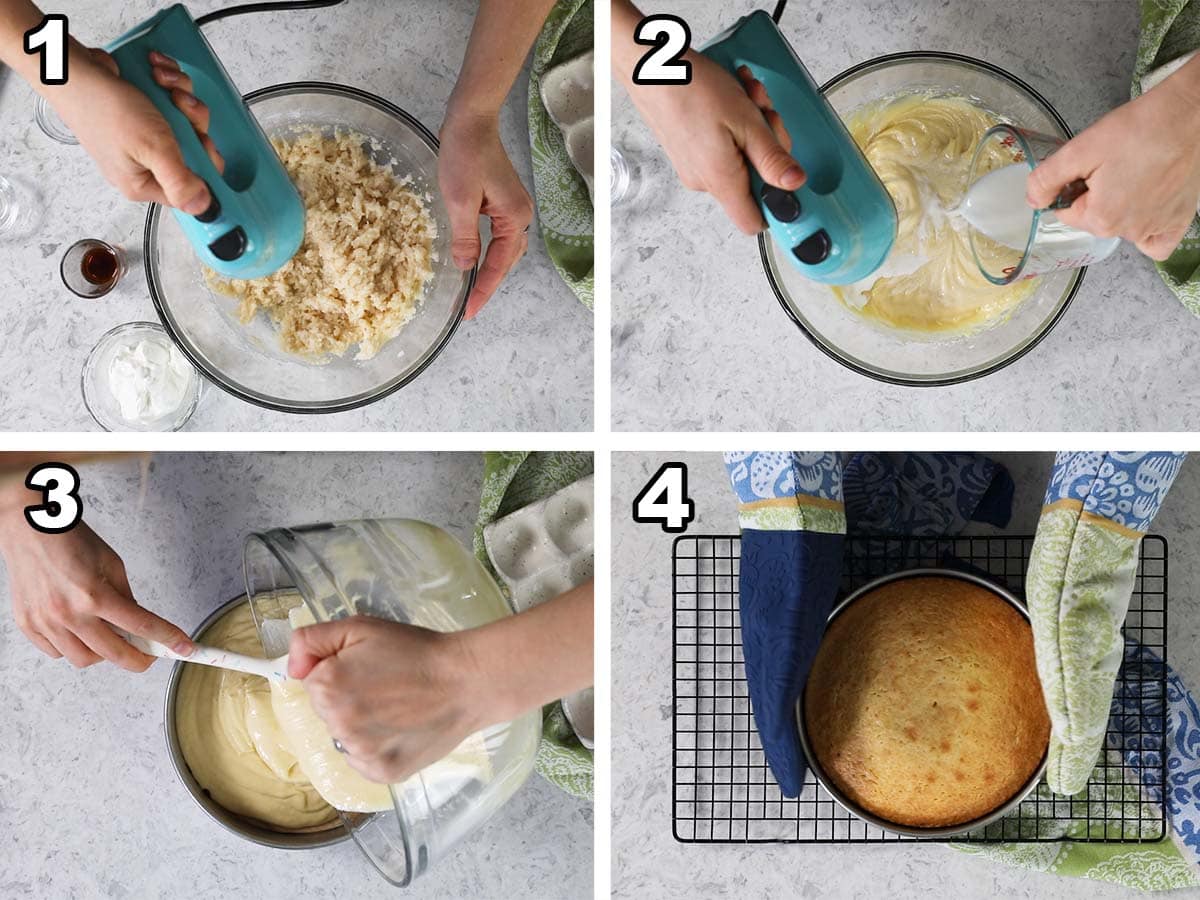
- Combine dry ingredients – Whisk together the dry ingredients and sugar in a large bowl, then add the melted butter and oil. Stir until well combined.
- Add wet ingredients – Stir in the sour cream, eggs, and vanilla, then add the milk and stir until smooth.
- Bake – Pour the batter into a greased/floured/lined baking pan and bake at 350F for 32-35 minutes. Use a toothpick to test for doneness.
- Cool completely – Let the cake cool in its pan for 10 minutes before removing to a cooling rack.
Making the Frosting
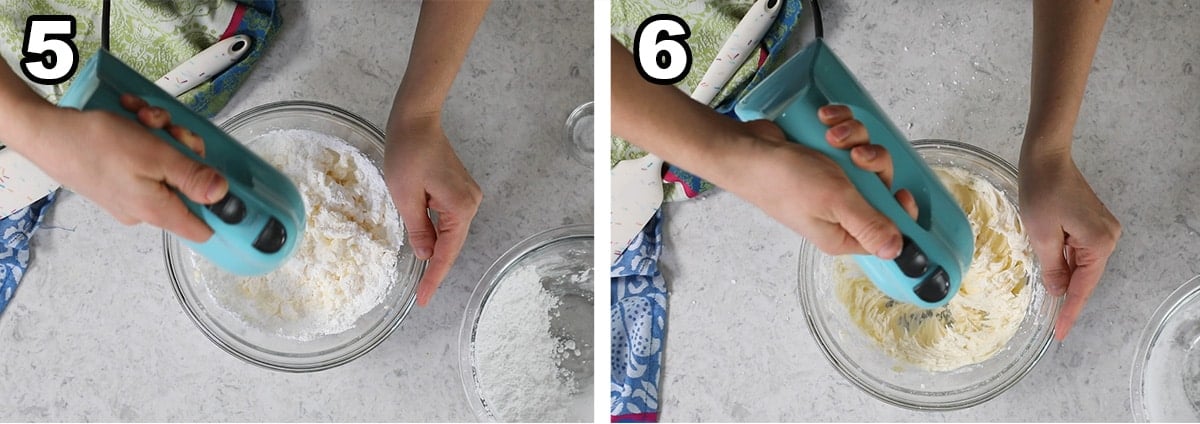
- Combine butter and sugar – Beat the butter until creamy, then gradually stir in the powdered sugar.
- Add the flavorings – Stir in the vanilla, salt, and just 1 tablespoon of cream until smooth. If needed, add the additional cream.
Rolling the Cake Pops
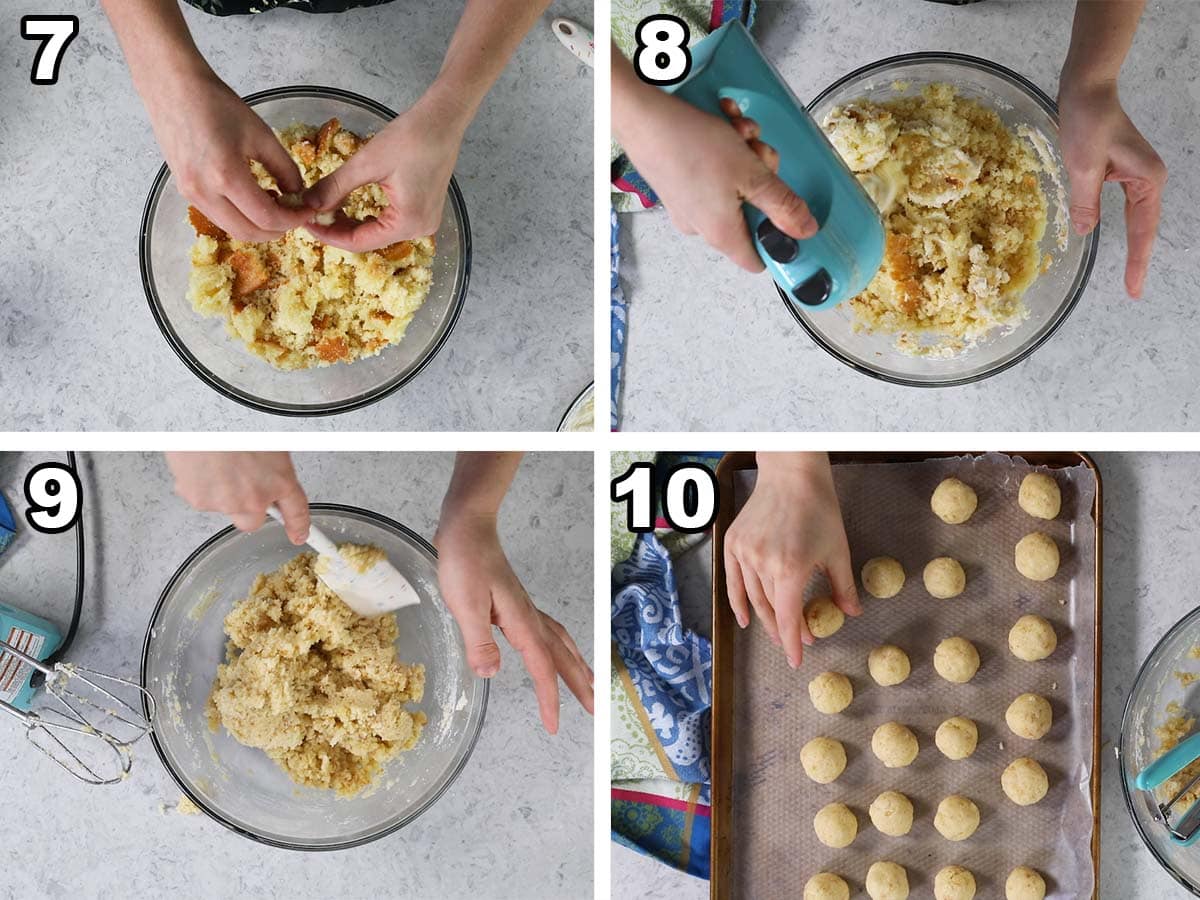
- Crumble the cake – Once completely cooled, crumble the cake into a large bowl. Don’t overdo it, you’ll break it up further after you add the frosting, so just focus on breaking it into smallish bits.
- Stir in the frosting – Add the frosting and stir with a mixer until the mixture is mostly combined.
- Texture check – Check to make sure the dough clings together when pinched between your fingers.
- Roll into balls – Roll 1.5 tablespoon scoops into smooth balls and place on a wax paper lined baking sheet. Freeze for 30 minutes.
SAM’S TIP: Freeze your cake balls for 30 minutes, then remove them. Freezing too long can cause the chocolate to crack when you add it. Alternatively you can refrigerate the pops for several hours or overnight; just be sure to cover them tightly before refrigerating so they don’t dry out.
How to Assemble and Dip
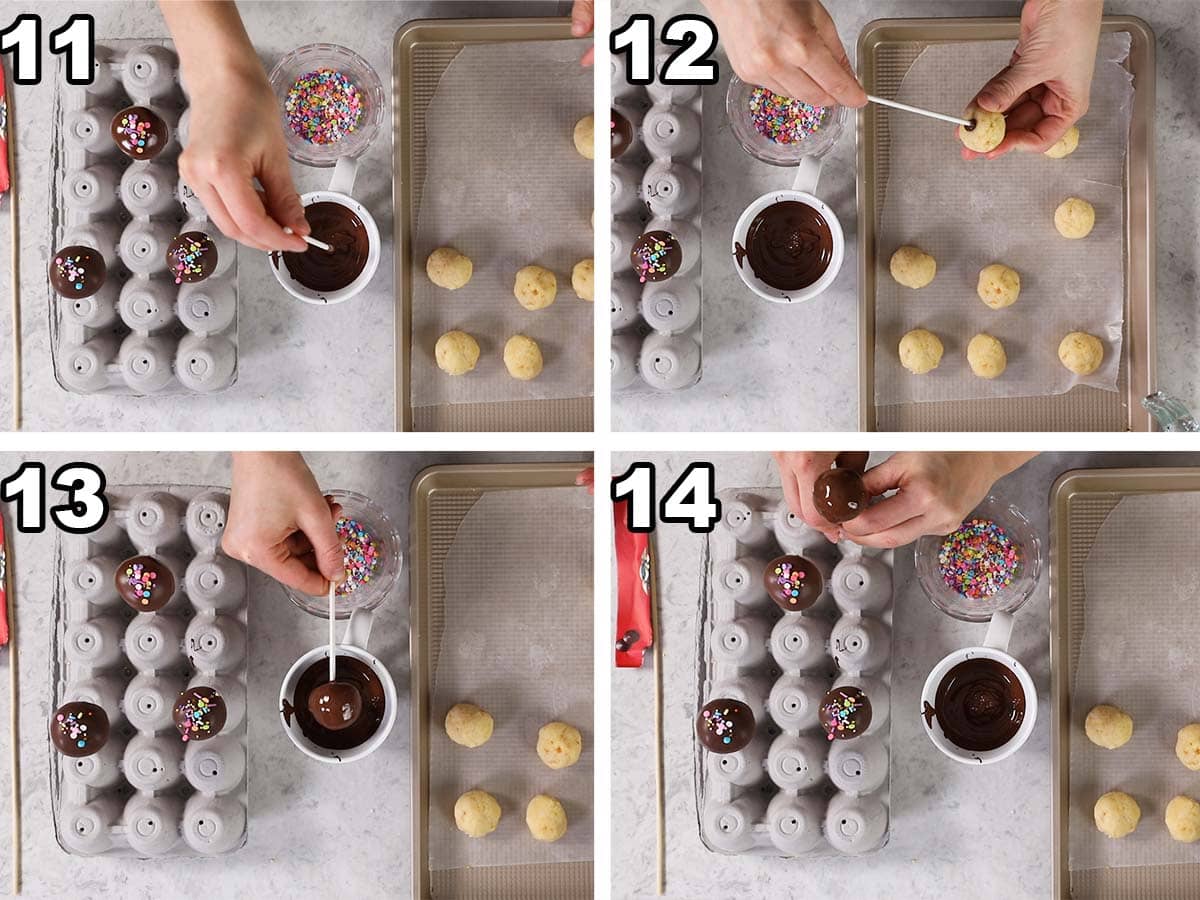
- Melt the chocolate – Melt your chocolate and remove your cake balls from the freezer. Dip the end of one stick in chocolate.
- Add your stick – Pierce the dipped end of the stick halfway into a cake ball.
- Dip – Dip the cake pop in your melted chocolate (make sure to coat the entire cake ball). Let the excess chocolate drip back into the glass/bowl.
- Let harden – Pierce the stick end of your cake pop into an upside down egg carton. Add sprinkles while the chocolate is still soft.
SAM’S TIP FOR EASY DIPPING: I typically melt my chocolate in a large bowl and then pour it into a more narrow dish (like a 1-cup measuring cup or a drinking glass) to make dipping easier.

Frequently Asked Questions
These can be made up to 10 days in advance if stored in the fridge. If stored at room temperature, they can be made up to 3 days in advance.
No, but they will last longer in the fridge. I actually prefer mine cold out of the fridge because their texture is a bit fudgier when stored this way.
Yes! You can store your pops in an airtight container in the freezer for up to 9 months. To thaw, simply let your pops sit in the fridge overnight.
Feel free to get creative with these! Use a colored candy coating, add different extracts to your frosting, use funky sprinkles, etc.
Enjoy!
Let’s bake together! I’ll be walking you through all the steps in my written recipe and video below! If you try this recipe, be sure to tag me on Instagram, and you can also find me on YouTube and Facebook

Cake Pops
Prevent your screen from going dark
Servings: 35 cake pops
Calories: 147kcal
Instructions
Cake
Preheat oven to 350F (175C) and lightly grease an 8” or 9” (20 or 23cm) round cake pan with baking spray. Set aside.
In a large mixing bowl whisk together cake flour, sugar, baking powder, baking soda, and salt until well-combined.
1 ½ cups (168 g) cake flour, 1 cup (200 g) granulated sugar, ¾ teaspoon baking powder, ¼ teaspoon baking soda, ¼ heaping teaspoon salt
Add melted butter and oil and use a spoon or spatula to stir until completely combined.
6 Tablespoons (85g) unsalted butter, ¼ cup (60 ml) vegetable, canola, or olive oil
Add sour cream, egg, egg yolk, and vanilla extract and stir until well-combined.
½ cup (113 g) sour cream, 1 large egg + 1 large egg yolk, 1 teaspoon vanilla extract
Add milk and stir until batter is smooth and uniform.
¼ cup whole milk
Pour batter into prepared pan and bake on 350F for 32-35 minutes (begin checking at 28 minutes if using 9” pan) or until the top springs back when lightly touched and a toothpick inserted in the center comes out clean or with a few moist crumbs.
Allow cake to cool in pan for 10 minutes before inverting onto a cooling rack to cool completely. Prepare frosting while cake cools.
Frosting
Place butter in a mixing bowl and use an electric mixer to beat until creamy.
½ cup (113 g) unsalted butter
With mixer on low-speed, gradually stir in powdered sugar until combined.
2 cups (250 g) powdered sugar
Add vanilla, salt, and 1 tablespoon of cream and stir until well-incorporated and frosting is smooth. If frosting seems stiff and too thick, stir in remaining tablespoon of cream.
1 teaspoon vanilla extract, Pinch of salt, 1-2 Tablespoon heavy cream
Assembly
Use your hands to crumble cooled cake into a large bowl. Don’t mash it, just break it into small pieces.
Add frosting to the bowl and, using your electric mixer, stir on low-speed until mixture is piecey and mostly combined and will cling together if you pinch it between your fingers. Mixture will not be smooth and it’s better to not overdo this step (see video or photos in blog post if a visual is helpful).
Scoop dough by level 1 ½ Tablespoon and roll between your palms to make a smooth ball. Place on a wax paper lined baking sheet (don’t let the cake balls touch) and repeat until you have rolled all cake balls. Transfer to freezer and freeze for 30 minutes.
Dipping
When cake pops are nearly finished chilling, prepare your chocolate by melting according to package directions.
15 oz chocolate or white chocolate melting wafers or almond bark
You’ll need a place for the chocolate on the cake pops to harden: flip two cardboard egg cartons upside down and use a skewer to pierce a hole in the center of each protruding cup. Check that your cake pop stick will fit snugly in the hole.
Remove cake pops from freezer. Take a cake pop stick and dip the very end in chocolate, then insert this halfway into the cake pop.
Turn the cake pop upside down and dip in chocolate until entire cake pop is covered. Lift from the cake pop and turn gently to allow the excess chocolate to drip back into the cup, then insert the stick into your egg carton holder. Space the cake pops far enough that they won’t touch and make sure to balance the egg carton (don’t place all on the same side or it will flip!).
Immediately add sprinkles after dipping each one (the chocolate hardens quickly). Repeat until all cake pops have been dipped. Allow chocolate to harden before removing and enjoying or storing.
Sprinkles
Notes
Flour
I recommend cake flour, but all-purpose may be substituted. You would need 1 ⅓ cup (168g).Storing
Store in an airtight container at room temperature for up to 3 days, in the refrigerator for up to 10 days, or in the freezer for several months.Nutrition
Serving: 1cake pop | Calories: 147kcal | Carbohydrates: 20g | Protein: 1g | Fat: 7g | Saturated Fat: 5g | Polyunsaturated Fat: 0.3g | Monounsaturated Fat: 1g | Trans Fat: 0.2g | Cholesterol: 20mg | Sodium: 23mg | Potassium: 15mg | Fiber: 0.1g | Sugar: 16g | Vitamin A: 178IU | Vitamin C: 0.03mg | Calcium: 15mg | Iron: 0.1mg
Nutritional information is based on third-party calculations and should be considered an estimate only. Actual nutritional content will vary based upon brands used, measuring methods, cooking method, portion sizes, and more.
Related Recipes
Source link